Last week I finally started guiding again, climbing Sunh-a-do (Mt Olympus) with a return client. This route is awesome, and doesn’t deserve the “bad rock” press it receives. Here’s the beta:
Sunh-a-do (Mt Olympus 7980 ft / 2432 m) East Face, II 4th class, glacier travel
Mt Olympus is a massif, with three distinct summits (East, Central, and West) and several subsidiary peaks. The West Summit is the highest. Because of the glacier travel to the summit pyramid, the Grade II rating is a bit misleading, but accurate if we only consider the ascent - most parties take a full day to climb the mountain from any route and return to their camp in Glacier Meadows.

The incredible Blue Glacier, showing our traverse line across, the final ascent to Snow Dome (far right), the return traverse across the upper glacier through Crystal Gap, and the final climb up the summit pyramid.
Gear: For the East Face, I found that no gear beyond a rope and locking carabiner was needed. For the North Face and West Ridge (both rated 5.4), I did bring 4 stoppers, 3 cams, my favorite #11 hex, four slings, and belay devices. We also brought small glacier travel kits for crevasse rescue.
Bear canisters are required: Just like North Cascades National Park, bear canisters may be borrowed (with a credit card number left for security). Unlike North Cascades National Park, bear canisters are not accepted. We brought one of each, and simply hung the bear bag up appropriately until we had eaten enough to fit everything into the canister.
Rope: A 30m rope was completely adequate. I would bring this rope to climb all three routes, planning on descending the East Face afterwards. There are two rappel stations for descending with 60m rope, but why carry an extra 5 pounds for over 20 miles for one or two rappels? The summit pyramid could actually be climbed with 15m of rope, but then I would have needed to bring a skinny static rope for glacier travel, defeating the weight savings. And 30m is the shortest rope in my quiver anyways.
Permits: Wilderness Permits must be received from the Olympic National Park Wilderness Information Center in Port Angeles, Washington. These permits are physical - you have to either have them mailed to you or physically pick them up. An interagency public lands pass ($80/annually) or a park entrance fee (approximately $20/vehicle) will be required to reach the trailhead.
Drive: The first guardian of the mountain is the drive - 3.30-4.00 hours from Seattle. But getting there is pretty straight forward. Simply head to the Twilight-famous town of Forks, Washington, head 13 miles south on Hwy 101. Then turn onto the Hoh River Road and follow it for 18 miles to the Hoh Rainforest Visitor Center. A Park Service entrance kiosk is at about mile 12.
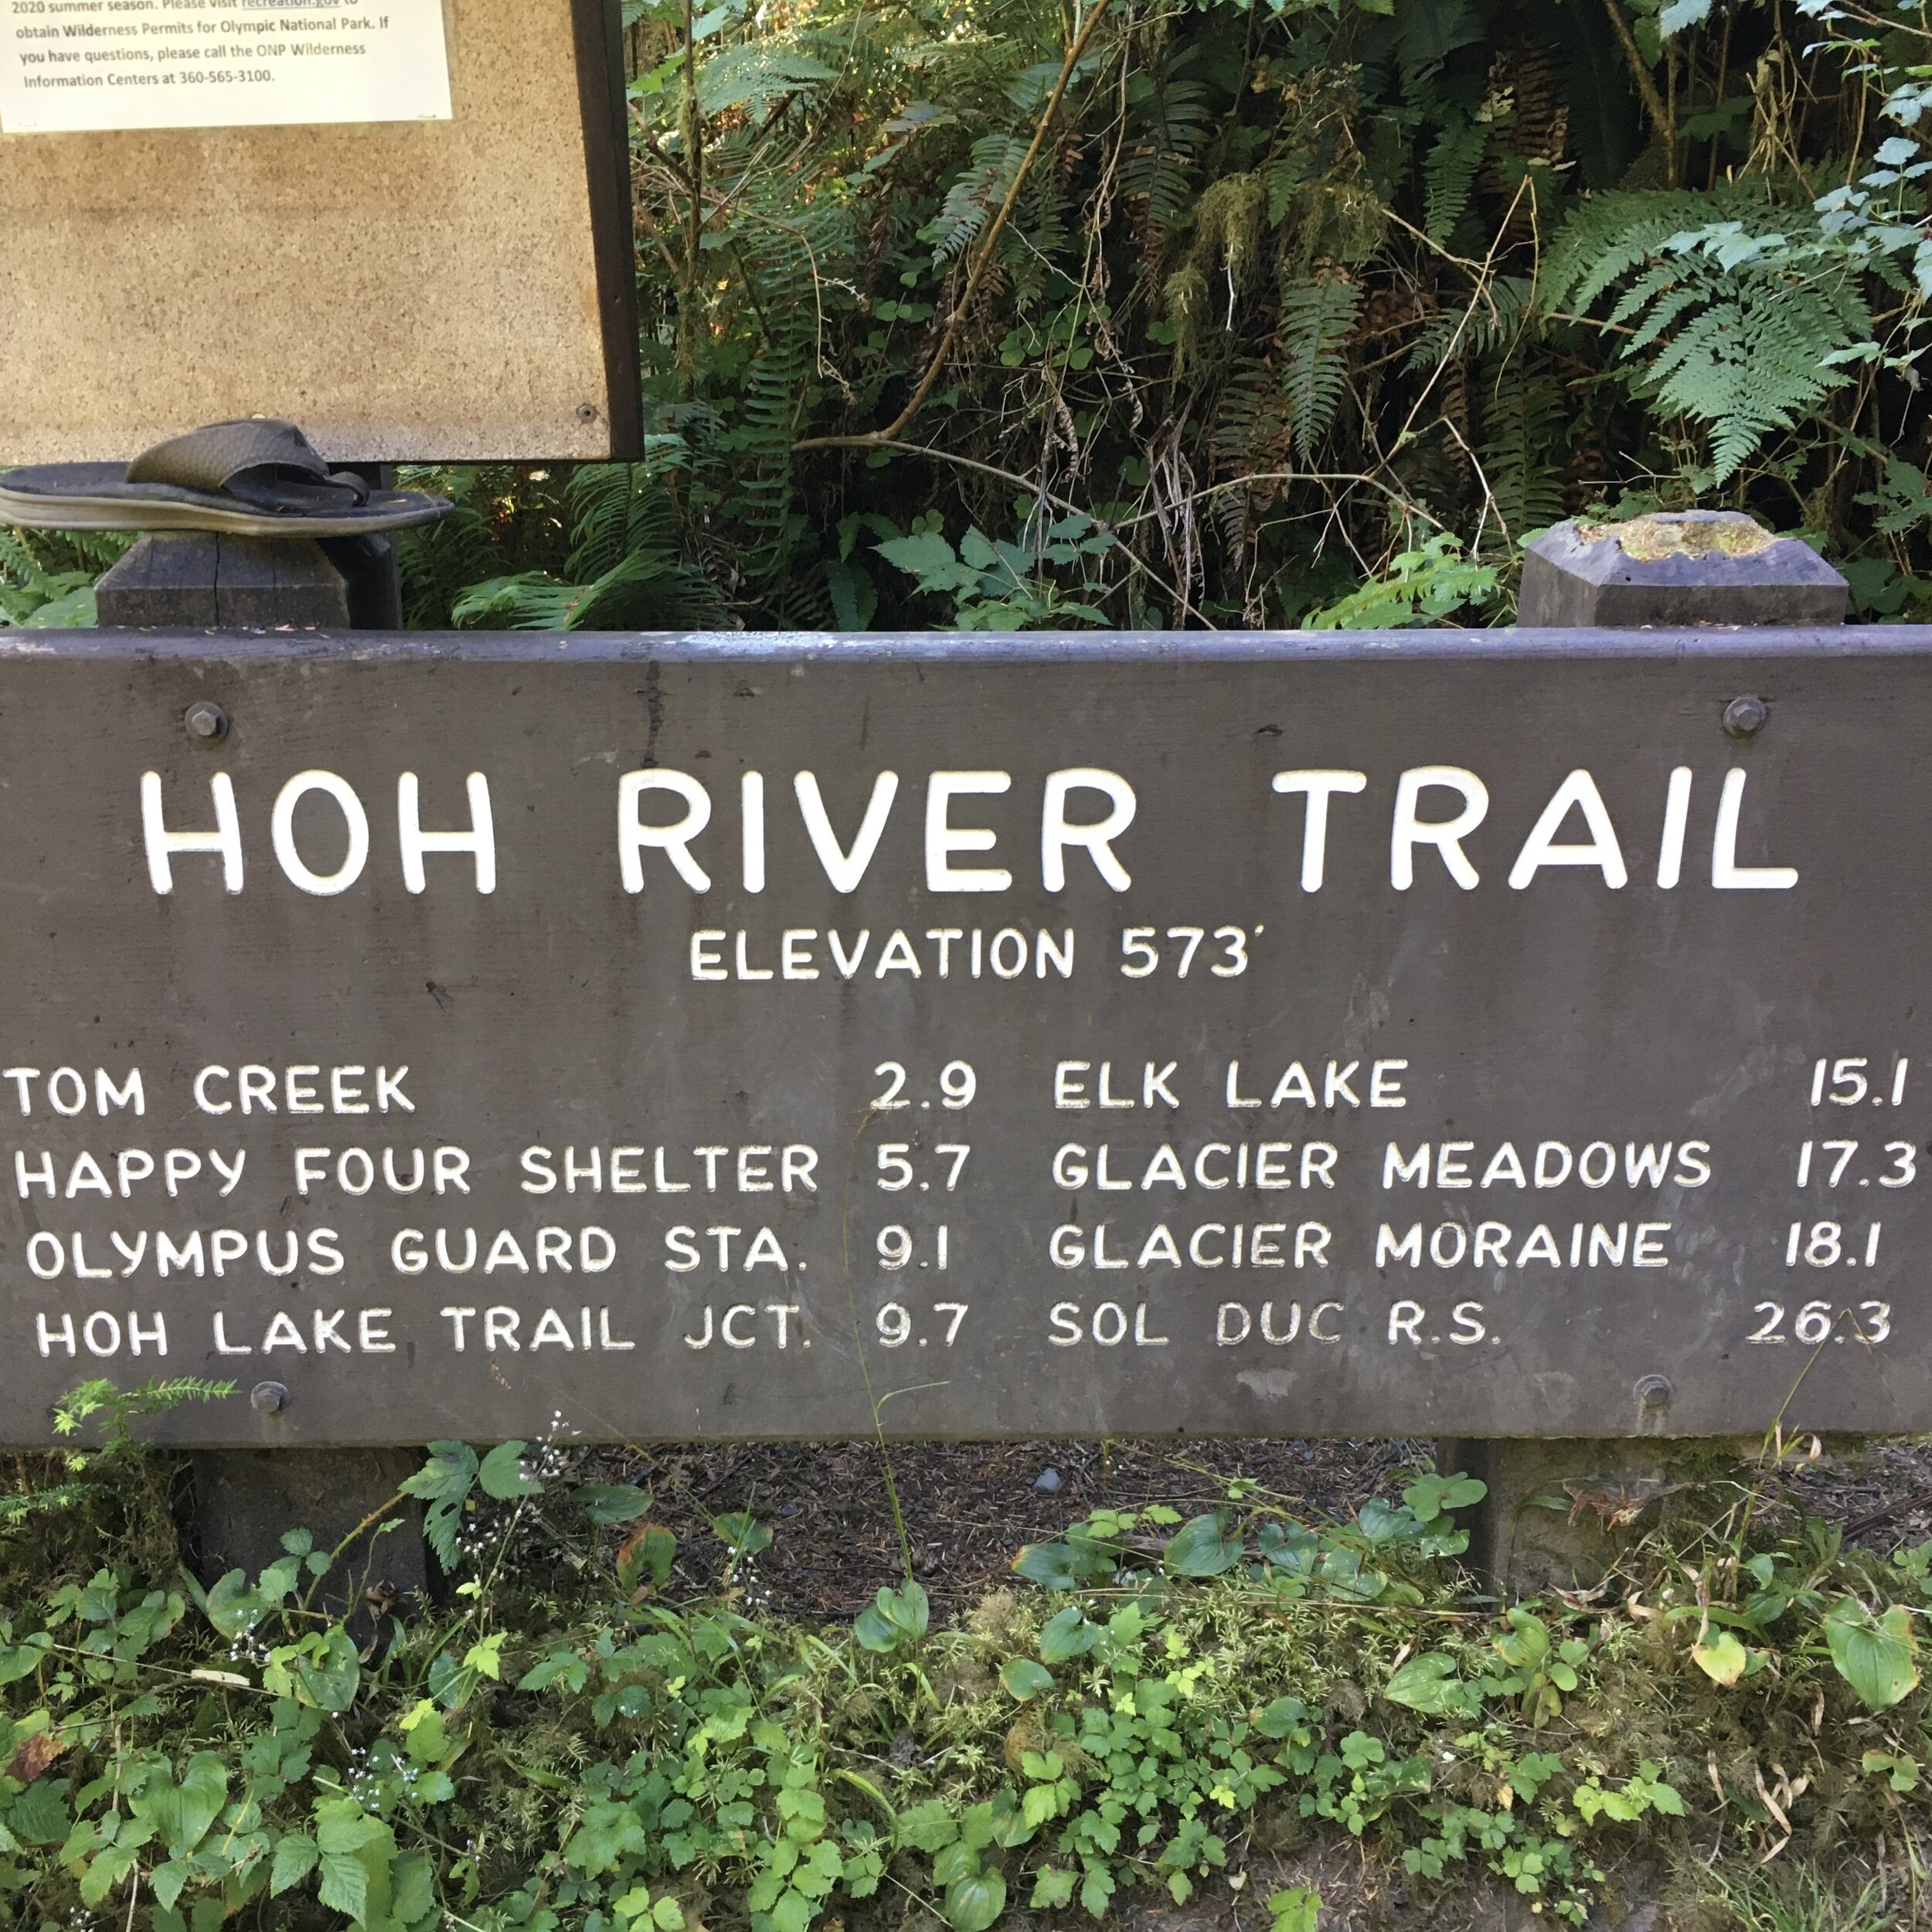
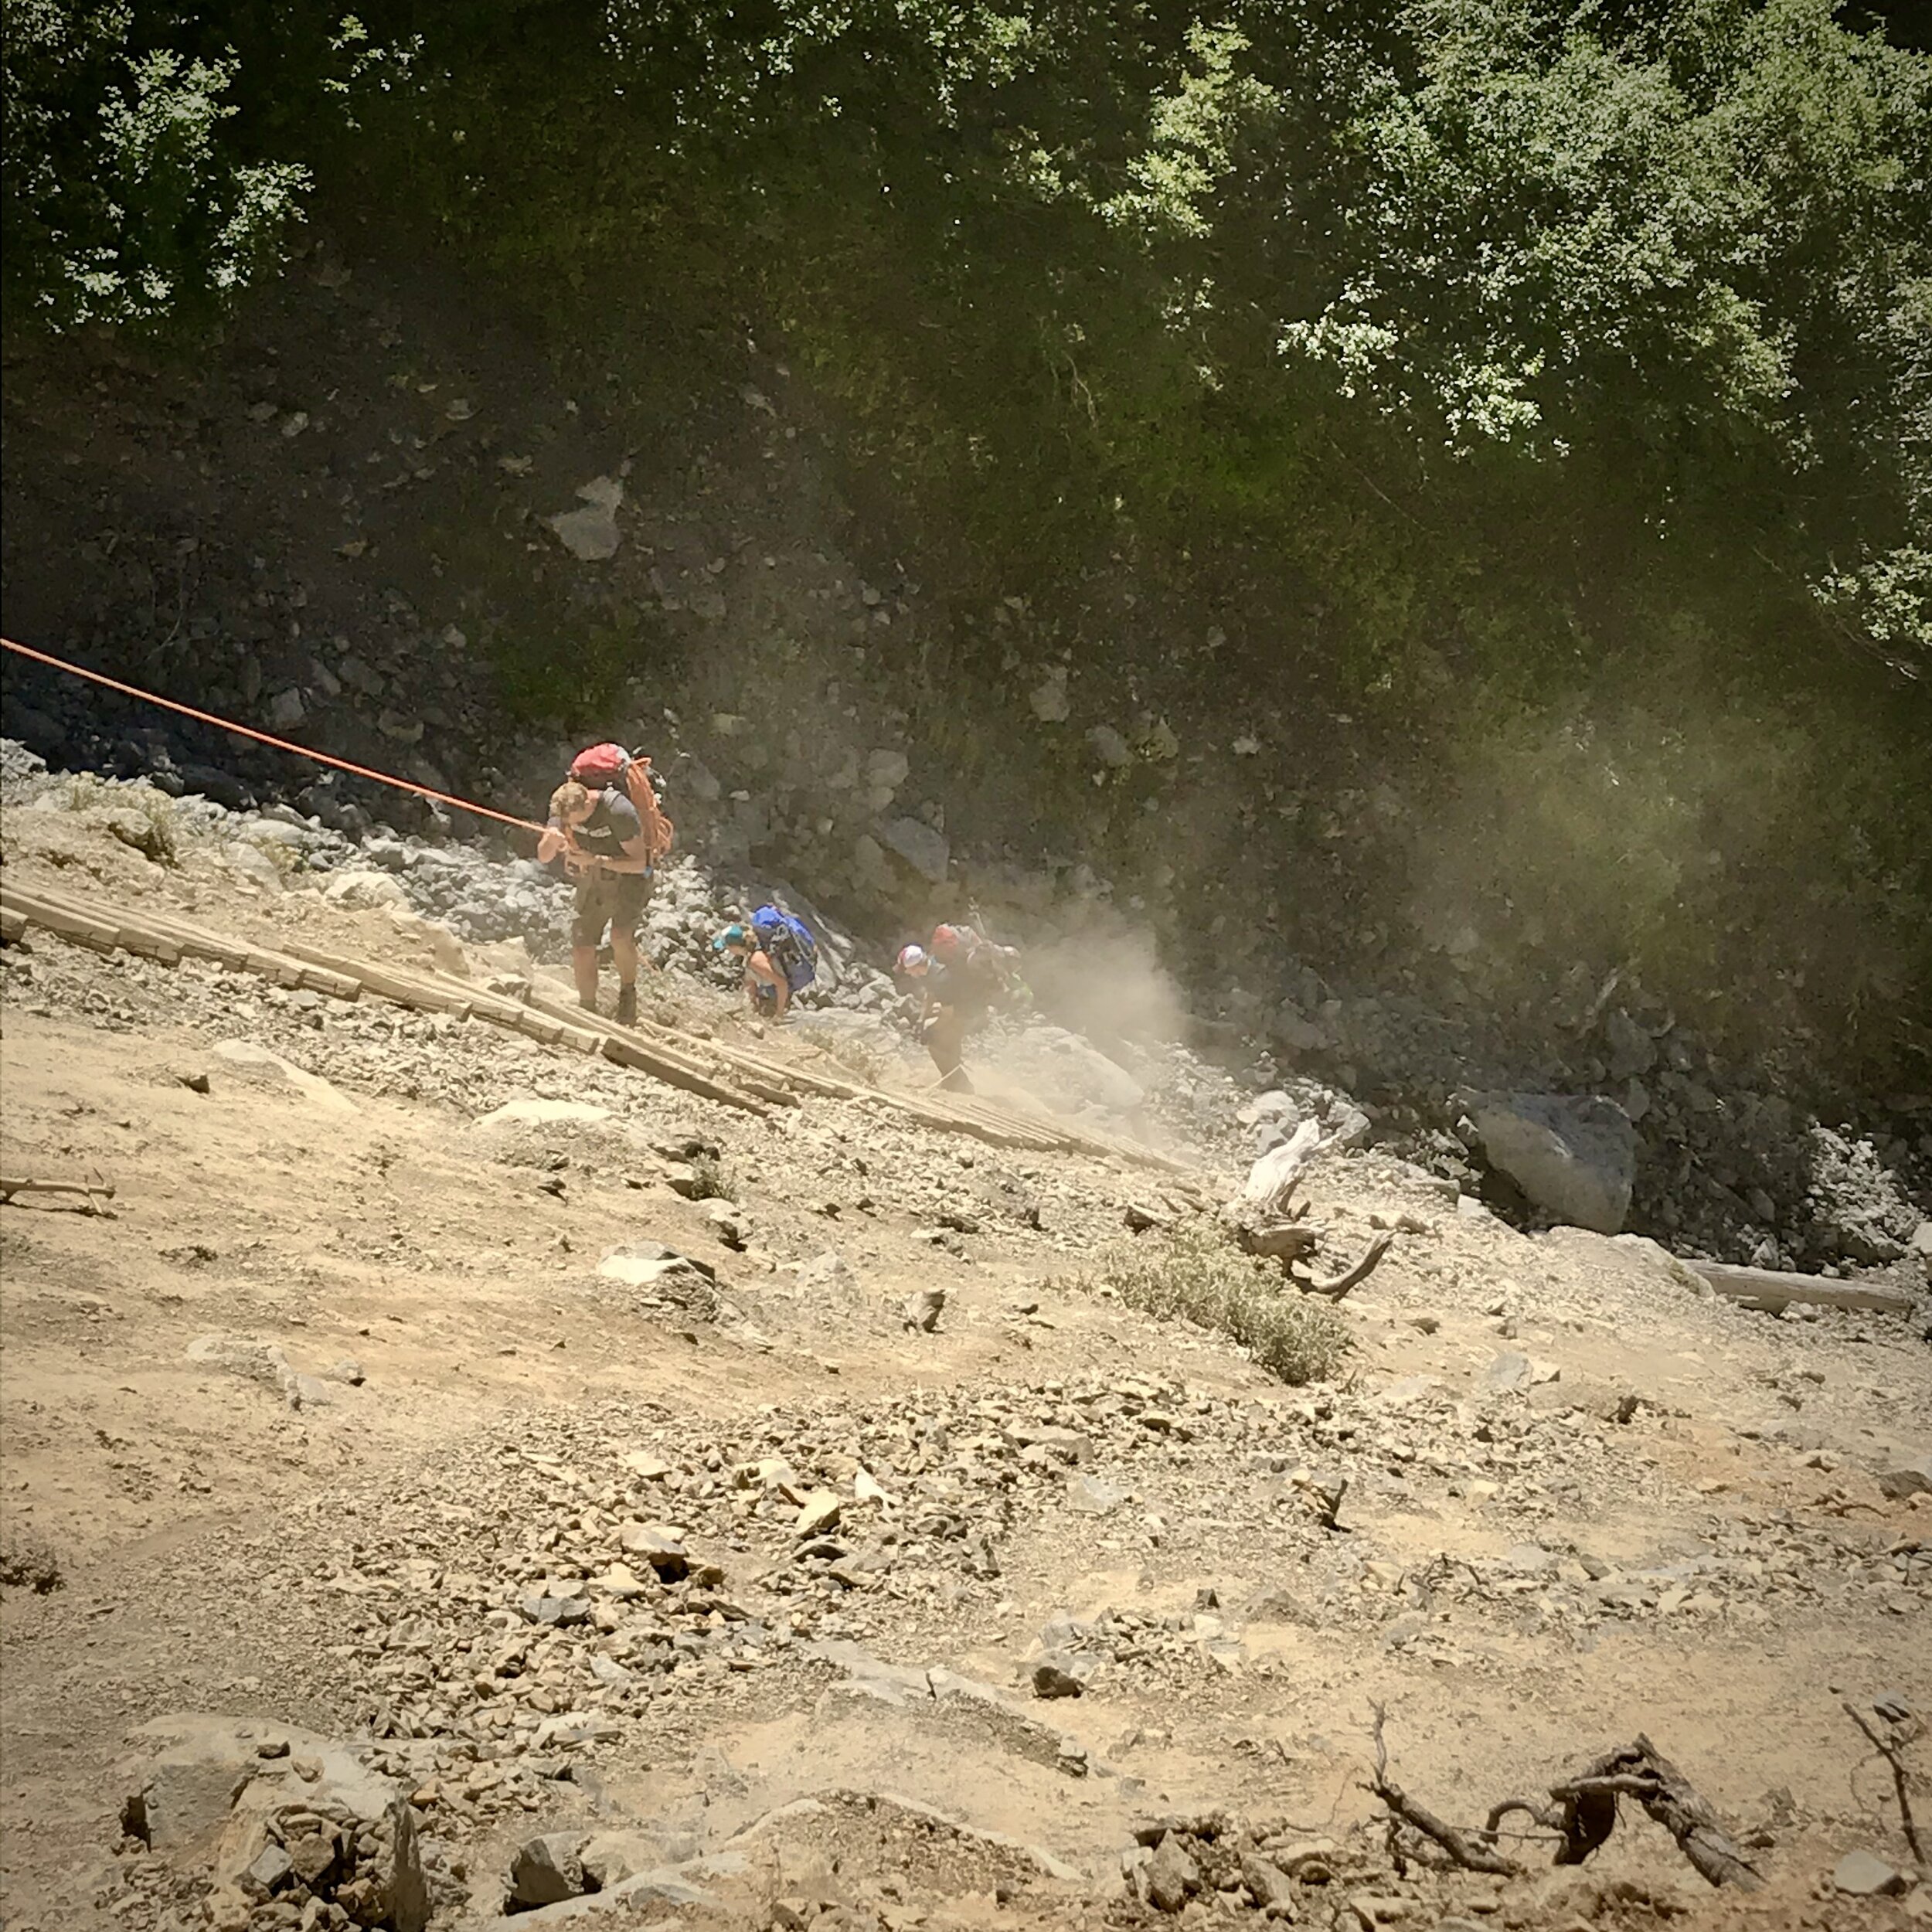
Approach: Sure, Sunh-a-do gets run up and climbed in a day. But most teams take two days to hike the 18 miles to Glacier Meadows, a day to climb, and a day to two days to hike out. This is a popular trail for backpackers and climbers - the former group often camps lower at Elk Lake and spends a day hiking up to the incredible view on the lateral moraine. For climbers, making it to Glacier Meadows is the goal. There aren’t anymore campsites between there and the glacier, so little point in carrying your kit higher unless you have a unique itinerary in mind.
Olympus Guard Station (9.1 miles), Lewis Meadows (10.5 miles), and Camp 13.2 (13.2 miles) are the most common campsites for the approach and descent.
Route: From Glacier Meadows, follow the trail signs past the Glacier Guard “Station” (a tent platform deck) to the Lateral Moraine (about 30 minutes). Beta I’ve received said the Blue Glacier has retreated far enough to make the Terminal Moraine option not recommended. Follow an unmaintained climbers’ trail down and south to the glacier (about 30 minutes). We followed a medial moraine forming on the glacier upstream as far as we could before putting on crampons and crossing the glacier to the other side. Take another look at the photo at the top of the post.
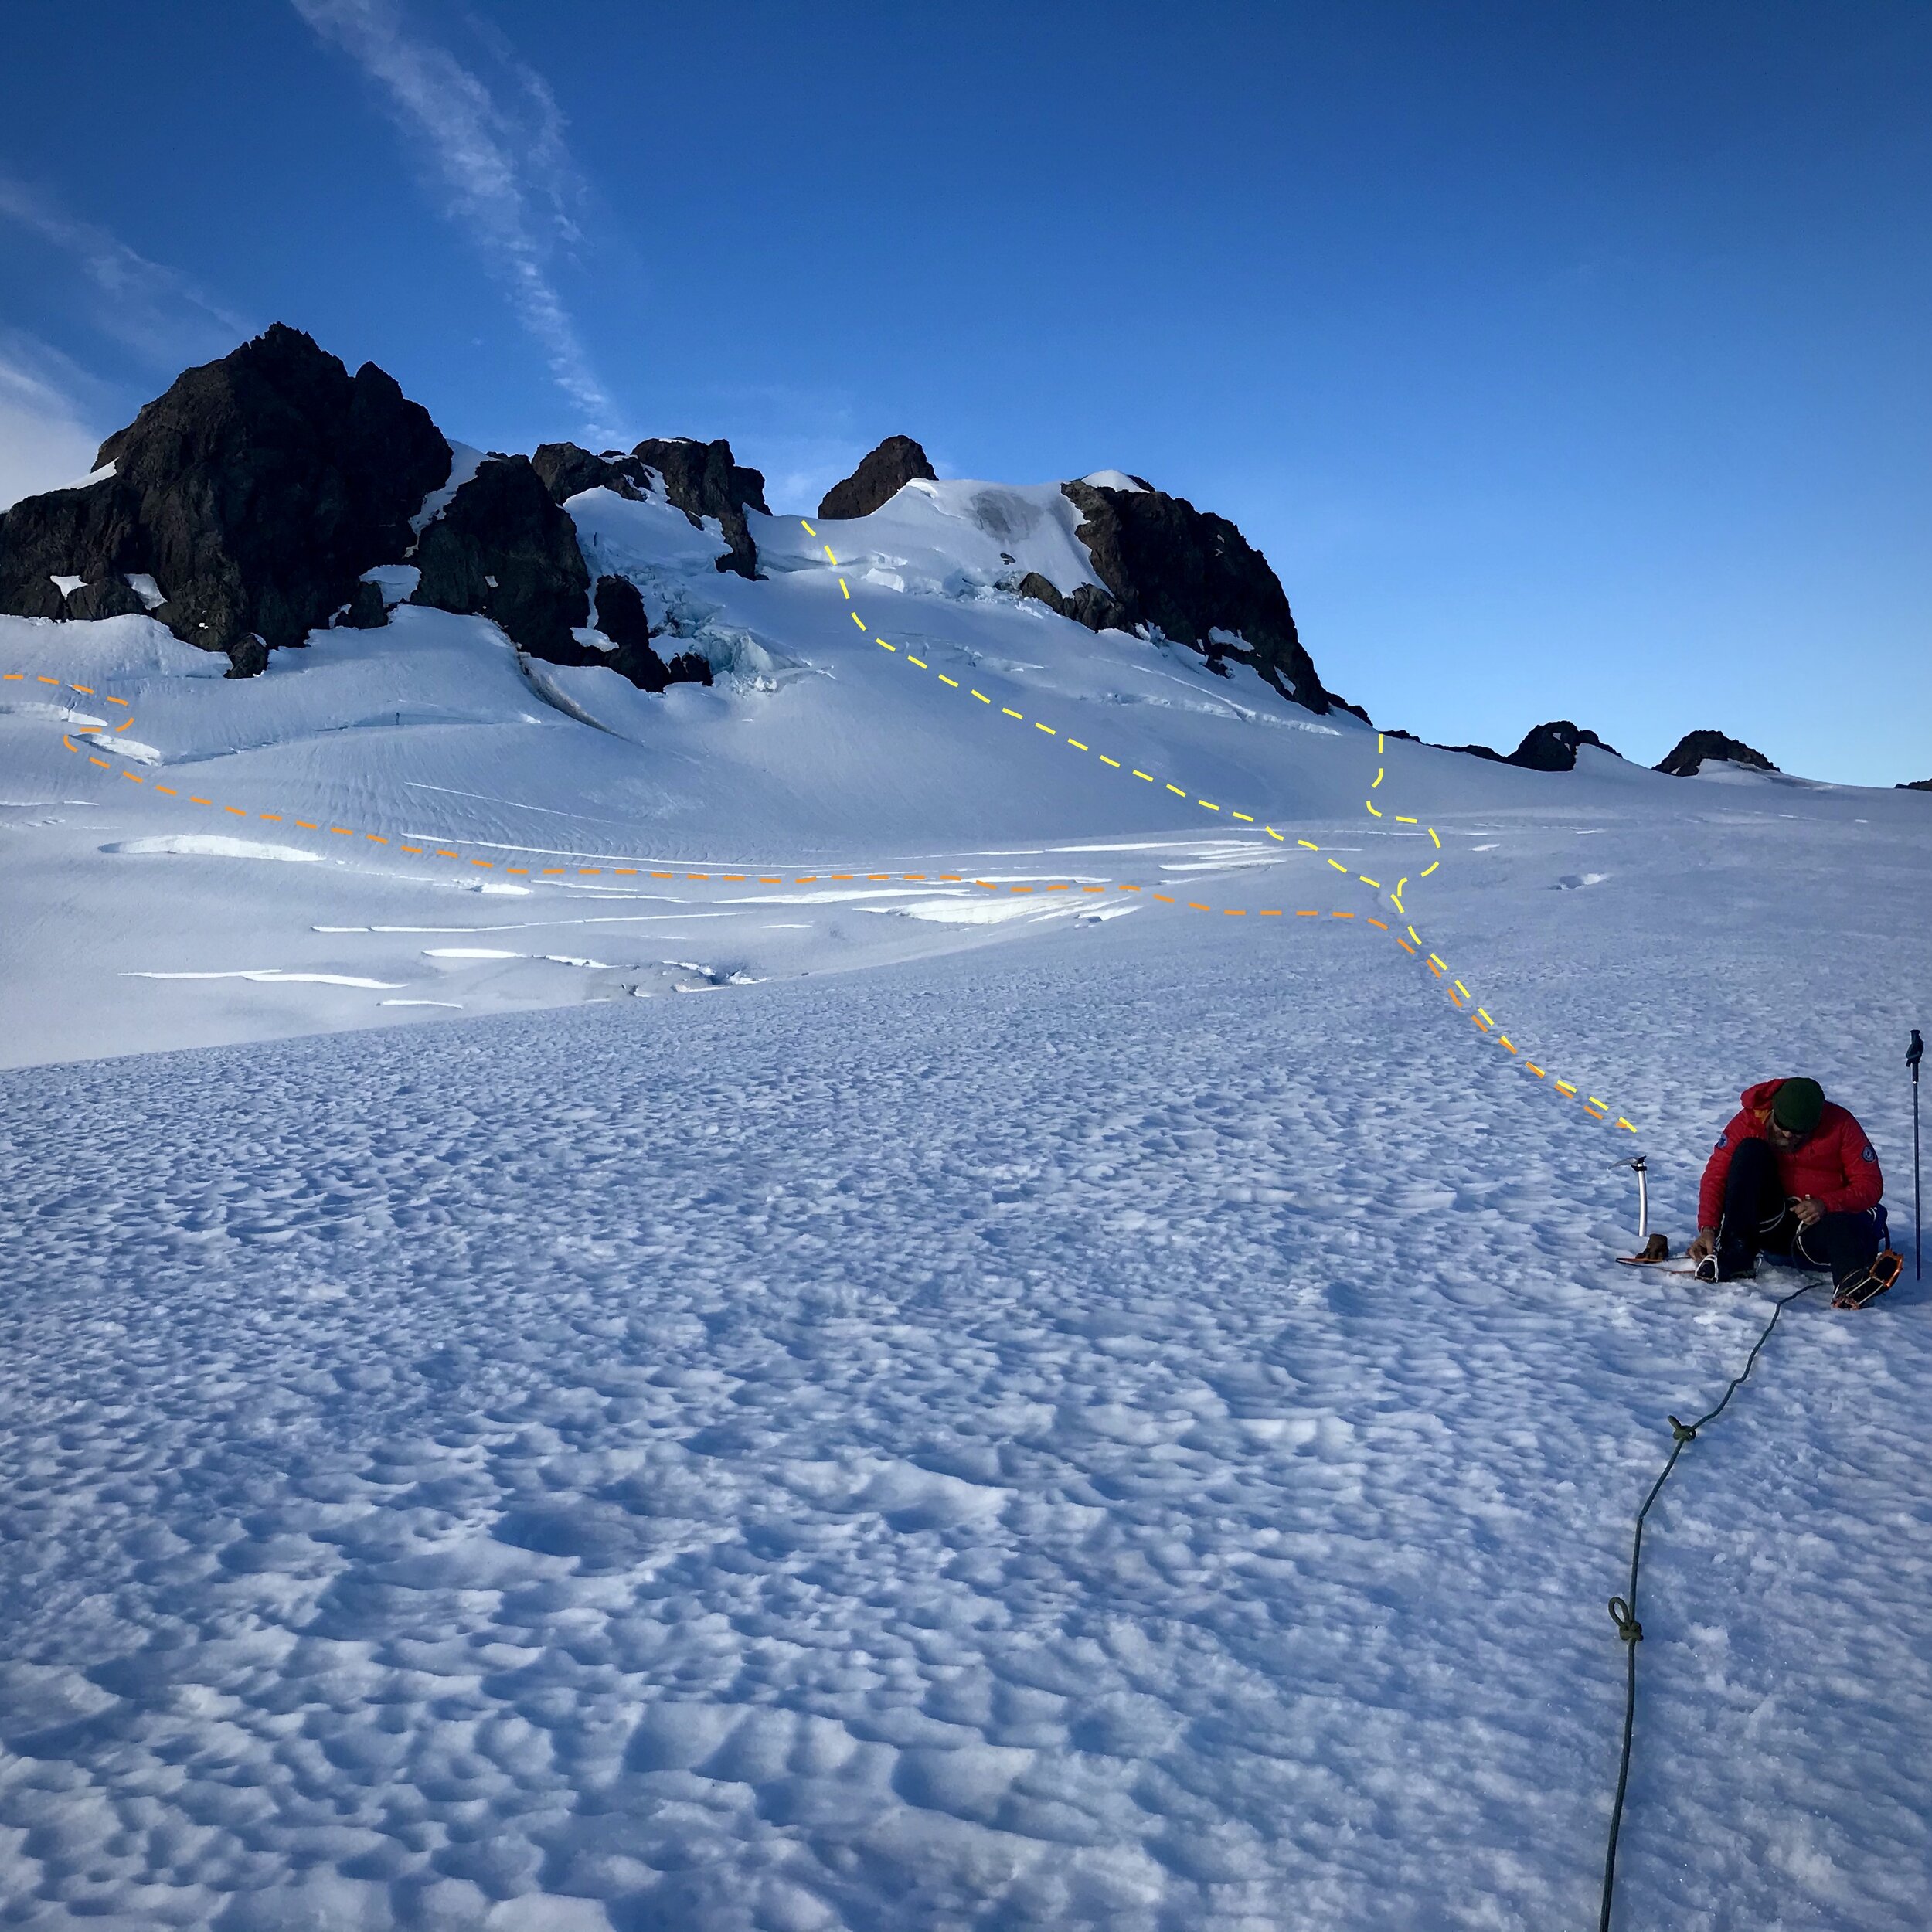
At the time, the lower glacier was dry (bare of snow), so roping up wasn’t necessary. Crevassing was minimal - the melt chanels were a bigger problem. Aim for the bay formed from the right-most icefall and the rocks below Snow Dome, and leave the glacier for the snow fields and bare rock stretches to regain the glacier just a few hundred feet below the Snow Dome, where we finally roped up and continued. After the initial climb, an relaxing traverse south across the upper Blue Glacier leads to the Five Fingers - the right most peak in sight is the West Summit of the massif, your target. If conditions allow, you could make a straight line for that saddle, climbing a few pitches of steep snow. For us, the bergschrund crevasses made access from the north side impossible, so we crossed through Crystal Gap - the left-hand/eastern-most notch visible in the Five Fingers. On the other side, easy glacier travel continues up to the last Finger. We were able to take crampons off here, scramble up the Finger, and descend the other side to the saddle and the summit pyramid.

Crystal Gap. Showing our route in orange.
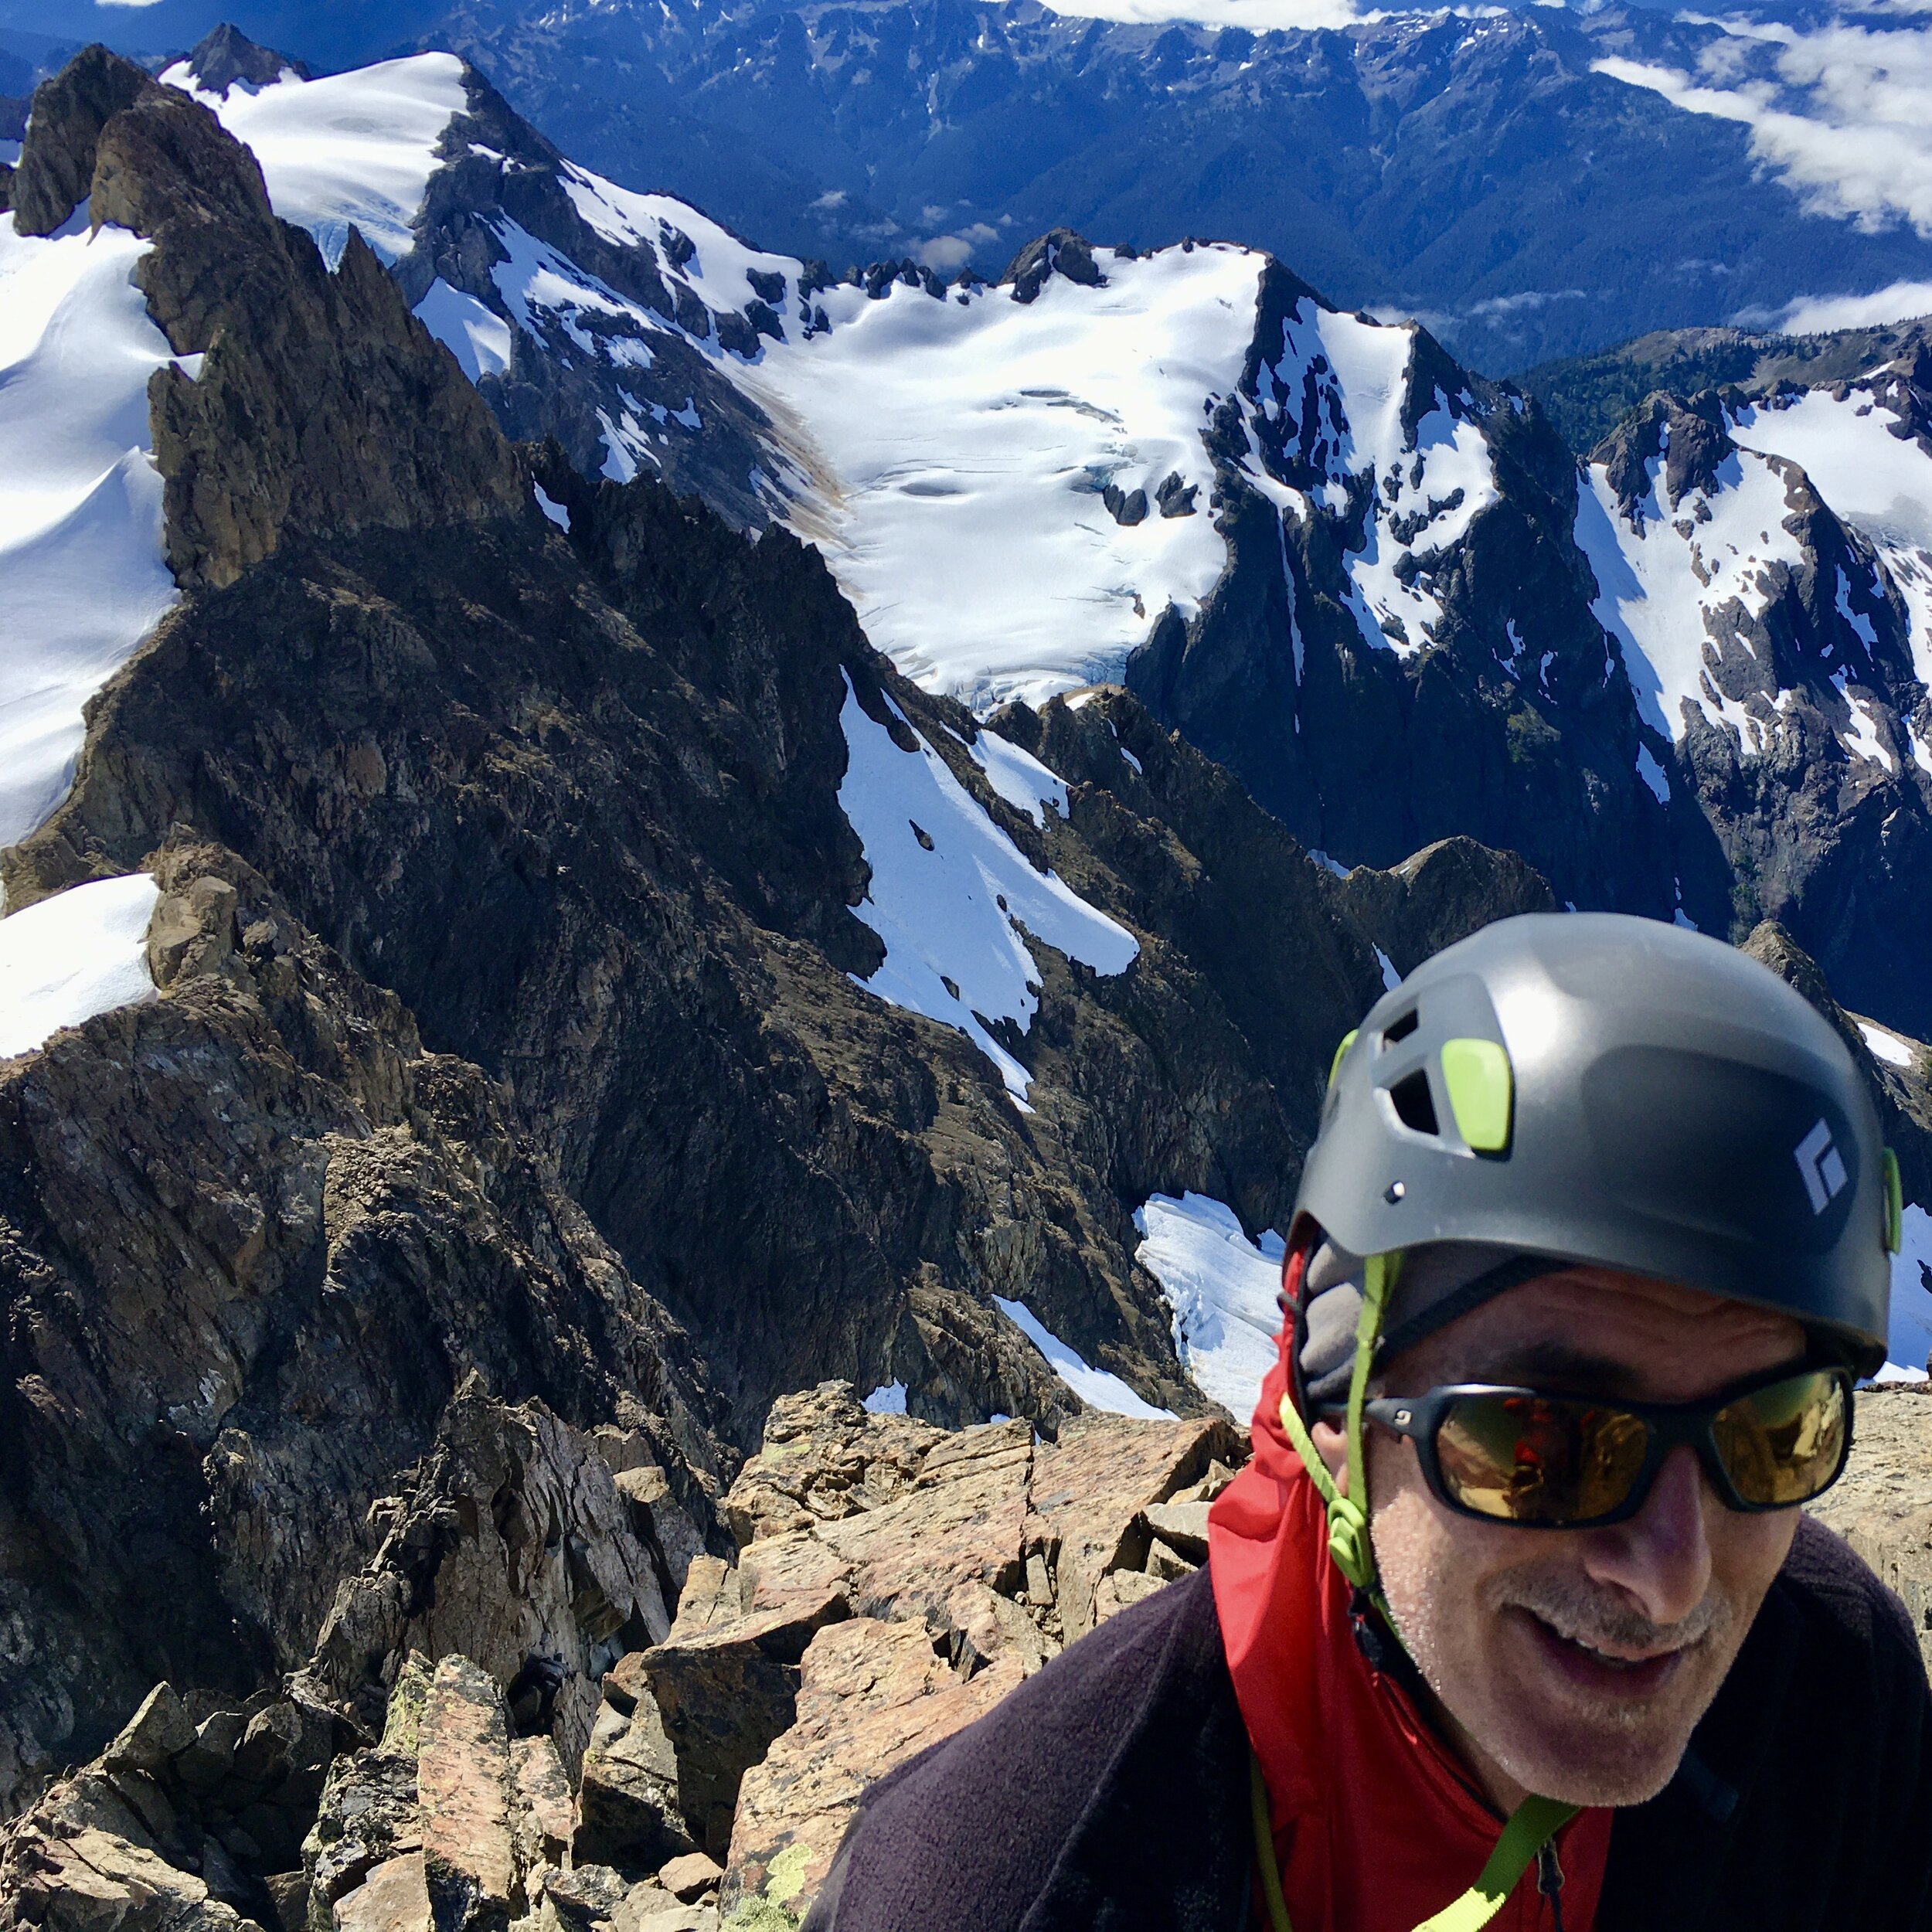
Technically, this is the crux. Two routes ascend from here. The North Face is climbed from the high point of the snow, and consists of 60m rock up to 5.4. But recently the moat and a bergschrund crevasse have opened up so much that from mid summer onwards its impassable. Instead, some parties are suckered into climbing to the highest point possible below the crack, crossing onto rock, and then pitching out in 2-3 rock pitches to the summit. They come back talking about how scary the crossing was, how loose the rock was, and how bad the climbing is.
Alternatively, the East Face begins from the lowest point in the saddle. If pitches are kept to no longer than 15 meters, and a team follows the most traveled line carefully, they climb difficulties of no more than 4th class. At least we did. I found plenty of horns to provide terrain belays, and with good short roping we made short work of the climbing and enjoyed ourselves. My client even said it reminded him of the Matterhorn, and joked that we had climbed looser things before. Just short of the top, a steep crack can be seen underneath a rappel anchor. If the leader goes left to the ridge knife-edge they’ll find easier climbing. A short scramble from there leads to the top.

West Summit Pyramid from the last Five Fingers. Yellow - North Face. Orange - East Face. Red - the approximate route teams had recently been climbing. It appears that teams commonly rappel a full 30m from the upper (orange) anchor then traverse over to the lower (red) anchor, easily spotted as you ascend. We did a short rappel from the upper anchor and easily down climbed the remainder. All route lines are approximate. Photo | MountainProject.com
Descent: From the summit, we returned to the upper rappel station, where I lowered my client approximately 5 meters directly off the anchor and then counter-balance-rappeled to join him. Then we simply down-climbed the route, providing terrain belays on horns at the same steps down that we had up.
Alternatively, teams behind us were rappelling longer, then traversing to a mid-station to do a full 30m rappel to the snow. We heard cries of rock and saw members scrambling around looking for better options.
After this, its just a matter of following your path back across the glacier, up to the moraine, and back to camp. Your descent from there is really up to your own preferences and abilities.


Resources: Olympic Mountains: A Climbing Guide (4th ed, Mountaineers Press, 2006) is the current in-print (I think?) guidebook. I did find the approach information and maps lacking detail. Also, some of the distances are simply incorrect, but only by a few tenths of a mile. MountainProject.com also provided some good information, especially of the summit pyramid.
To see more photos - especially some awesome scenery shots, tremendous trees, and Peter’s feet at the end of the climb - check out my Instagram feed @simmonsmountainworks!
Disclaimer: Rock climbing, mountain climbing, and backcountry skiing is DANGEROUS. Injury and death are unavoidable risks. This post is for informational use only and not for instruction. Conditions may have changed since this post was composed, and may contain inaccurate or misleading information. The reader assumes all risk associated with the sport , and assumes all responsibility for any accidents and injuries resulting from applying this information in the real world. The author makes no warranties, expressed or implied, that the information contained in this post is accurate or reliable.